PR Contact

Saturday, April 28, 2012

The Best Red Lipcolors for Less than $10


These are by far not the ONLY red lipcolors you'll find at the drugstore, but they're some of my personal favorites!  All of these are less than $10, and fabulous on every skin tone.  Google swatches of them - company photos don't do them justice!
----------------------------
NYX Soft Matte Lip Cream in "Amsterdam" - $6 - Nyxcosmetics.com, Ulta 
This creamy lipcolor goes on like a gloss, dries a soft matte and feels silky smooth on the lips!  They last quite a long time and are simply flawless.
Revlon Superlustrous Matte Lipstick in "Really Red" - $7 - drugstores
This super-saturated color is perfectly matte, and the cool red shade is flattering on all skin tones!
NYX Round Lipstick in "Chaos" - $5.50 - Nyxcosmetics.com, Ulta
This is a creamy, smooth lipstick that packs a punch of flattering color!  This shade will go with any skin tone.
NYX Round Lipstick in "Snow White" - $5.50 - Nyxcosmetics.com, Ulta
This is a deep, sultry red with cool undertones - a great vampy color without going too dark.  Very flattering, creamy and easy to wear!
Covergirl Lip Perfection in "Flame" - $8 - Drugstores
This is a fire-engine-red lipstick!  The formula is creamy and smooth, and the color really says 'look at me!'
Rimmel Lasting Finish Lipstick in "01 Red" - $6 - Drugstores
A very opaque, smooth color... a true red shade, perfect for any skintone.
L'Oreal Colour Riche Lipstick in "True Red" - $8 - Drugstores
This brand is known for it's reds, and this lipstick should be the posterchild.  It is, most definitely, true red... the formula is rich and creamy, almost moisturizing.

Let's Talk About Eyebrows!


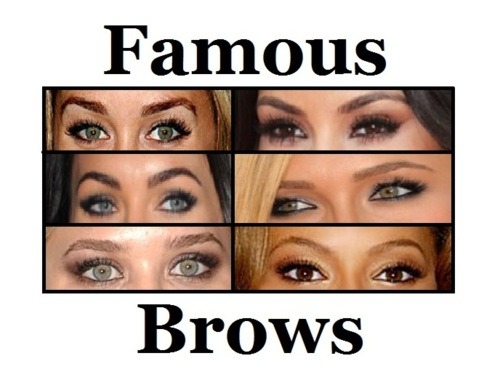
It's easy to go horribly wrong, but so worth it if it's done correctly!  Let us discuss the art that are eyebrows.
------------------------------------
Firstly - Whether you fill your brows or not, please make sure that they are shapely and neat!
The eyebrows are actually the foundation of your face... they give you expression and depth. Most people have no idea how important eyebrows are - see THIS POST. Having a clean, trimmed set of brows is immediately going to make your face look much lighter and any makeup you wear much more professional.
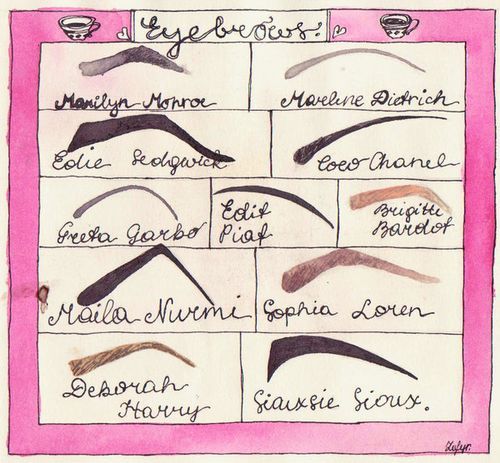
Eyebrows don't have to be stick thin - thick, bold brows are actually a huge trend.  But finding a happy balance is key.  Every person's brows have a particular shape, and it's not wise to try and change that shape, for it will look unnatural.
There are simple rules for brow shaping.… basics, but they’re the best guidelines.  
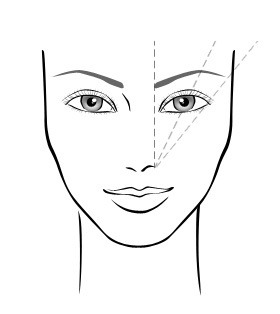
+  Use a pencil, makeup brush, something long and thin, and hold it vertically against your nose.  This is where your brows should begin.
+  Not moving the pencil from your nose, rotate it so it crosses your pupil… this is where the arch should be (where the pencil crosses your brow, not directly above your pupil.)
+  Continue rotating the pencil until it lines up with the outer corner of your eye… where the pencil points to should be the ending of your brow.  If you have issues with the ends of your brows, you might want to play first with outlining… use an eyebrow (or liner) pencil to sketch along the bottom of your brows to see where you want them to go.
+  If you want your brows to be very neat, trim them occasionally.  Brush the hairs up towards your forehead, and use brow or nail scissors to carefully snip the hair that extends farther than you'd like.  But you have to be incredibly careful, and go very little at a time... it's much too easy to get rid of too much.
---------------------------------------
An easy way to avoid mistakes and get the best brows is to visit a professional, at least once every six months (you can then maintain them yourself at home).  The methods of brow shaping are varied, but all work effeciently:
+  Waxing - the most popular method of hair removal anywhere, including the brows.  This is quick and easy (if a bit painful).  However there are benefits... over time, the hair will begin to grow in slower, thinner, and lighter with waxing.  Getting them waxed professionally can cost anywhere from $5 to $20, depending on where you live and where you go.
+  Threading -  this is a "newer" trend in eyebrow shaping, although the history of this goes back years and years.  This is a quick and almost painless way of precisely removing hair.  With twisted thread, hairs are caught and yanked out quickly without irritating the skin.  This can cost anywhere from $5 to $20 - but if you teach yourself (like I did) it's definitely worth it!  And your friends will love you.
+  Plucking - usually this is the home remedy for shaping brows.  Using tweezers, you yank hairs out by the root.  This is always ideal - tweezers are portable, and you can remove stray hairs on the go, or while you're in a rush, with no mess.
+  Shaving - I have to mention this, if only to say DON'T DO IT.  Never shave your eyebrows.  Not only is it scary, but shaving causes hair to come back in thicker, quicker, darker and straight - your brows will stick straight up into the air, instead of laying flat.
Does it hurt when you pluck at home?  Run a washcloth under hot water, wring it out, and apply it like a compress to your brows.  The steam will open up the pores and soften the skin, making hairs easier to remove!
Are your brows red and irritated afterwards?  Apply a toner with a cotton ball.  I prefer Witch Hazel - it is an anti-inflammatory, and is ideal for healing cuts, scrapes, razor burn, or irritated areas.
--------------------------------------
To Fill, or Not to Fill - That's a Good Question!
Makeup gurus seem to live by filling their brows.  But for many people, the thought has never occurred to them.  In most instances, you don't need to bother, but it can be nice for special occasions, especially if your brows are thin or patchy.
What do you mean, filling your brows?  When we say "fill", we basically mean "color them", trace them, or simply give them a little boost with makeup.  Filling can be done with pencil, powder, gel, or simply eyeshadow.  People who fill in their brows are attempting to make them look stronger and more even.
How do you do it?  There are many, many methods - too many to list them all!  Personally, I like my brows to look as natural as possible, so I just use a powder eyeshadow.
TIPS:
+  Always use a brow color that is 2 shades LIGHTER than your hair color.  If you are blonde, use a very pale, light brown.  If you are a redhead, go the same route. If your hair is black, DO NOT use black to fill in your brows!  Instead try a dark grey, if it's dyed, or a dark brown.
+  Brows are naturally lighter on the ends - keep most of the color in the middle of your eyebrows, and gently fade as you go outwards.
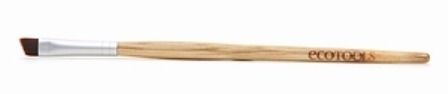
+  Use a brush!  Even if you like to use pencils to fill in your brows, use a nice brush to blend and fade the color to make it look natural.  Angled eyeliner brushes are perfect for this - they are very precise.  Your brush strokes should imitate the hairs in your brows, instead of just sweeping straight across.
+  Use concealer to make your brows really stand out!  If you have killer eyebrows, or if you'd just like to make them look as neat as possible, use a concealer a shade or two lighter than your skin tone, and with a small concealer brush, line the under part of your brow, blending down on your brow bone.
------------------------------------------------
DSP's Favorite Products for Eyebrows:
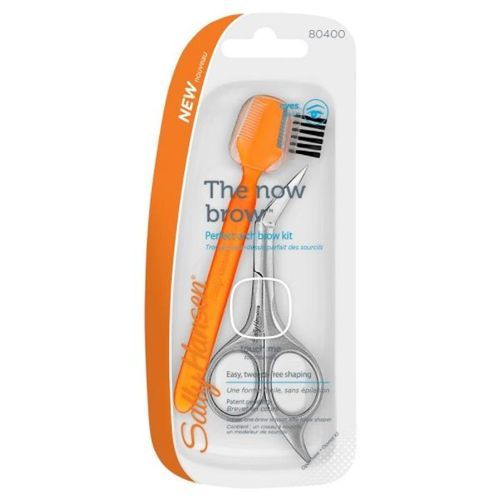
Sally Hansen "The Now Brow" Brow Shaping Kit - $7
Revlon Brow Fantasy 2-in-1 Pencil & Gel - $6
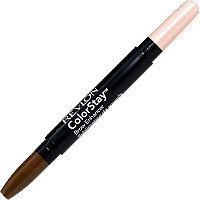
Revlon ColorStay Double Sided Brow Enhancer - $6
ELF Brow Kit - $3
EcoTools Angled Eyeliner Brush - $5
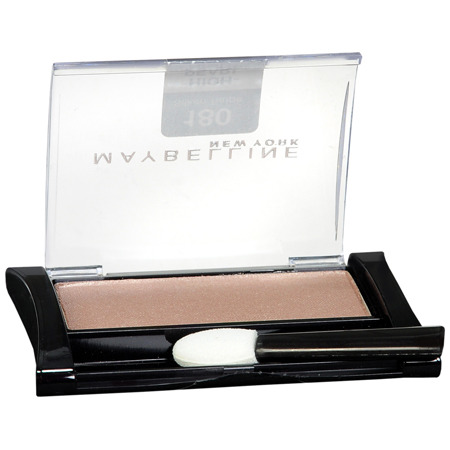
Maybelline Single Eyeshadow in Silken Taupe - $4

--------------------------------------------------------

Originally posted on DrugstorePrincess.com

--  DSP

Drugstore Foundations: A Quick Look, from the Best to the Worst!


My 2-Week Makeup Challenge: Day 6
You can find the challenge post *here* if you’d like to join in!

——————————————————
Day Six:  List every foundation you’ve ever used (that are worth mentioning) from Best to Worst
(I’m only going to do the inexpensive foundations I’ve used… otherwise this will be a VERY lengthy post!)

image
 Revlon Colorstay for Combination/Oily Skin
Big surprise!  I’ve reviewed it Here and Here

————————————————————
image
Neutrogena Healthy Skin Compact Makeup 
Neutrogena Healthy Skin is a miracle foundation for those of us with normal, dry, or very dry skin!  It’s hydrating and really nice to your skin, and can actually help heal and prevent breakouts.  This is a cream makeup that comes in a sleek compact.  This can apply very sheerly or can give a lot of coverage depending on how you apply it!  With SPF 55 you’re protected wherever you go. **I would also place the Healthy Skin Liquid Foundation in this spot - it is just as nice!**
——————————————————-
image
Physician’s Formula Organic Wear Tinted Moisturizer
This is my summer-skin staple!  This provides a ton of moisture and sheer, even coverage.  This also contains SPF 15… and the best part is that it is 100% Certified Organic.  There are no parabens, fragrances, dyes or other harmful ingredients, meaning that it’s going to baby your skin.  I love it!
————————————————————-
image
Revlon PhotoReady Foundation
This is a fabulous makeup product.  It provides very light but good coverage; it hides blemishes and other flaws very well, and is luminescent on the skin.  This is great for people with oily to normal skin (and dry skin, as long as you’re not flaky). It lasts quite a while on the face and the packaging is an incredibly convenient pump!
—————————————————————
image
Neutrogena Healthy Skin Enhancer
This is another tinted moisturizer that is very dear to my heart!  Although the coverage is sheer, it is even and luxurious.  It is very hydrating, contains SPF 20, and also includes Retinol which moisturizes, prevents wrinkles and can treat acne.
—————————————————————
image
L’Oreal True Match Super-Blendable Makeup
This is a creamy, easy-to-apply foundation that comes in a TON of shades, with different undertones to help you find the right color for you.  This does require a powder to set it if you have oily skin, but otherwise it lasts a decent amount of time.  True Match provides medium coverage and doesn’t feel cakey!  Unfortunately the bottles are small and inconvenient.
————————————————————-
image
 Maybelline Dream Smooth Mousse
This is a creamy, hydrating whipped foundation ideal for people with dry or normal skin.  Although this isn’t particularly longwearing, the texture is divine and it provides flawless coverage.  It softens the skin and doesn’t accentuate rough patches.
———————————————————————-
image
Almay Truly Lasting Color
TLC foundation by Almay is actually quite nice.  It does last a good amount of time, but I wouldn’t classify it as a “longwear” foundation.  The colors are varied and the coverage is nice… about medium to light.  
—————————————————————
image
Maybelline SuperStay Foundation
This is an okay product, but it doesn’t wow me.  It lasts longer than most foundations, but not long enough to be impressive.  It doesn’t control oil, and gets slightly shiny.  However the coverage and texture is similar to Colorstay, and you get a lot of product for your money.
————————————————————-
image
Rimmel Clean Finish Foundation
This is the only real foundation that I’ve enjoyed from Rimmel (that hasn’t been discontinued).  Although there’s really nothing clean about it, it does feel light on your skin while providing a nice medium coverage (not “poreless” as it claims).  The shade selection is not impressive, but if you are lucky enough to find the right color this is a decent product.  Also - to claim that there are “Vitamins” in a makeup product is a lie, and/or does nothing for your skin!
——————————————————————
image
Maybelline Dream Matte Mousse
This is a very popular foundation, and a lot of people seem to love it, but I’m afraid it’s a definite miss for me.  It just feels so cakey, and it doesn’t last long at all.  Even the matte finish, which at first is nice, turns shiny after a good half day of wear.  This is definitely something for oily-skinned people, because it accentuates flakes and dry patches on those who didn’t even know they had any.
——————————————————————-
image
Covergirl NatureLuxe Liquid Foundation
This is a very light, sweet smelling foundation that provides light coverage with an incredibly smooth texture.  However it only lasts about two hours and then leaves the skin feeling horribly greasy!  Even with powder, this doesn’t stay on your face, even if you don’t have oily skin.  The shade selection is quite poor, and there is NOTHING natural about this product.
—————————————————————-
image
Covergirl Clean Liquid Foundation
In my highschool years, I used Covergirl faithfully.  Looking back, it’s no wonder why I had a face full of acne!  Even though these claim to be “clean”, they aren’t at all.  The coverage is decent, and they don’t feel heavy on the skin, but the formulation of these is horrible and well-known for causing breakouts.  Even the oil-control formula doesn’t hide greasiness throughout the day!  These also transfer onto everything with the slightest touch.  I’m not a fan.
—————————————————————————
image
Maybelline FITme! Liquid Foundation
This foundation had a lot of hype when it first came out, but soon people realized it’s true nature.  Although it does work nicely for some people, for most it causes horrendous breakouts!  The shade selection is very nice though, which is surprising, and it looks very nice when originally applied.  It doesn’t have a long wear time, though, and this makeup transfers easily as well.  Too bad!  The shade range gave it good potential.
————————————————————————-
image
Covergirl TruBlend Liquid Foundation
This was my go-to in high school, and as I mentioned previously, my skin reflected that (badly!)  Even though this claims to “truely blend” into your skin, it doesn’t - it sits on top, feels greasy (and LOOKS greasy), transfers off your face within a few hours, and is not good for your skin whatsoever.  There are also only about 6 shades… very disappointing.  I blame my prolonged use of this on sheer ignorance!
—————————————————————-
image
ELF Studio Tinted Moisturizer
Unfortunately, I have to put this at the bottom!  As much as I love ELF, their foundation products simply don’t do the job.  This applied patchily, smelled strongly of sunscreen, had a horrible shade selection, provided NO moisture, and faded within an hour, literally.  It has the texture of a whipped mousse, but won’t blend into the skin at all.  It just plain looks bad.
———————————————————————-
Don’t worry… it’s OKAY if you disagree with me!  Certain products work better for certain people, and we all have different preferences when it comes to finish, texture, and formula.  These are my opinions.
Originally posted on http://DrugstorePrincess.com!

Easy Prom or Wedding Makeup - For Any Skintone, and Any Dress!


If you’re not the kind of person who usually wears makeup, or not someone who likes the idea of bright colors, tons of drama, or looks that will require a lot of maintenance, read on!
—————————————
All You’ll Need:
+  Your regular foundation (a longwear foundation is best)
+  A very light bronzer or natural pink blush
+  A natural pink lipcolor (lipstick or gloss)
 Black liquid eyeliner - if you’re more comfortable with pencil, try a gel eyeliner instead
+  Black WATERPROOF mascara (waterproof is a must for prom!)
+  A light, shimmery eyeshadow - cream, champagne, etc
+  (Optional, but preferred) a light brown eyeshadow, about three shades darker than your skintone.  If you have dark skin, a medium charcoal color will work.
For product recommendations, check out DrugstorePrincess.com for reviews!
—————————————————-
How-To:
1.  Apply a thin layer of foundation all over your face, blending slightly down your neck, to even out your skintone.  Make sure that your foundation matches your skintone, because it’s very obvious when makeup is the wrong color in photographs!
2.  Use concealer, or just a bit of the foundation, to hide spots or dark circles under the eyes.  Use just a small drop on your finger, and pat it onto the area you’re trying to hide until the makeup blends away.  PAT - don’t rub or swipe.  Set with powder if your skin is oily.  A setting spray, to set face makeup, is ideal!
3.  Use the bronzer or blush, whichever you prefer, lightly on the apples of your cheeks (that’s the MIDDLE of your cheeks, not the pudgy part near your nose!).  Blend this out well - you only want a subtle hint of color.  If you’re using bronzer, it might be a good idea to dust it on your face wherever the sun would naturally kiss your skin… your temples, nose, chin, etc.  
4.  Now for the eyes… use the shimmery light shade all across your lid, and on the inner corner (tear duct) of your eyes.  Use the brown eyeshadow and blend this into your crease, just to add a bit of depth.  Soften it quite a bit so that it’s very subtle.
5.  Line your upper lashline only, from the inner corner all the way across, winging out very slightly at the end.  This will accentuate your eyelashes and make them look longer, as well as adding a bit more drama to your eyes.
6.  Use mascara on your upper and lower lashes.  Wiggle the mascara at the base of your lashes first, to separate and add volume.  Then sweep upwards through the lengths of your lashes.  Make sure you get the smaller lashes on the corners of your eyes!  Since they rarely get coated, they’ll add a lot of drama without much effort.
7.  With your finger, apply a small amount of the light shimmery eyeshadow to your cheekbones as a highlight!  Blend it in well. This will make your skin look natural and glowing.
8.  Apply your lip color!
————————————————————————

Originally posted on http://PromWithDSP.tumblr.com  

Good luck, and have fun!